Repurposing your kids’ art is a fantastic way to preserve memories while also decluttering your space. Here are five creative ideas:Create a Gallery Wall: Dedicate a wall in your home to showcase your children’s artwork. Frame their masterpieces and arrange them in a visually appealing manner. You can rotate the artwork periodically to keep the display fresh.Make a Collage: Compile several pieces of art into a collage. You can either physically collage them onto a large board or scan them and create a digital collage that can be printed and framed.Turn Art into Fabric: Scan or photograph your children’s artwork and have it printed onto fabric. You can then use the fabric to create personalized items such as pillows, tote bags, or even clothing.Customized Stationery: Use your kids’ art to create personalized stationery sets. Scan or photograph the artwork and have it printed onto cards, notepads, or stickers. This way, you can share their creativity with friends and family.Art Book or Calendar: Compile your children’s artwork into a photo book or calendar. There are many online services that allow you to easily create custom books or calendars using your own photos. This way, you can preserve their artwork in a neat and organized format that can be cherished for years to come.
Subject: Request for Backflow Testing QuoteHey there,I hope this email finds you well. I’m reaching out because I’m in need of backflow testing for my property within the next two weeks. Could you please provide me with a quote for the service?Looking forward to hearing back from you soon.Best regards,
[Your Name]
Absolutely, starting with a 7-day workout plan is a great way to ease into resistance training. Remember to focus on proper form and technique, and listen to your body. Here’s a balanced plan that targets different muscle groups throughout the week:Day 1: Full Body WorkoutSquats: 3 sets of 10 repsPush-ups: 3 sets of 10 repsBent-over rows: 3 sets of 10 repsPlank: Hold for 30-60 secondsRest for 1-2 minutes between setsDay 2: Rest or Active RecoveryGo for a walk, do some light yoga, or engage in any activity that helps your body recover.Day 3: Lower Body FocusDeadlifts: 3 sets of 8 repsLunges: 3 sets of 10 reps per legLeg press: 3 sets of 10 repsCalf raises: 3 sets of 12 repsRest for 1-2 minutes between setsDay 4: Rest or Active RecoveryDay 5: Upper Body FocusBench press (or chest press machine): 3 sets of 8 repsPull-ups or lat pull-downs: 3 sets of 8 repsDumbbell shoulder press: 3 sets of 10 repsBicep curls: 3 sets of 10 repsTricep dips: 3 sets of 10 repsRest for 1-2 minutes between setsDay 6: Rest or Active RecoveryDay 7: Core and FlexibilityPlank variations: Side plank, forearm plank, etc. Hold each for 30-60 seconds.Russian twists: 3 sets of 15 reps (with or without weight)Bicycle crunches: 3 sets of 15 reps per sideStretching: Spend at least 10 minutes stretching major muscle groups, focusing on flexibility.Remember to warm up before each workout with some light cardio and dynamic stretches, and cool down afterward with static stretches. Also, adjust the weight and reps based on your fitness level, aiming for a challenging but manageable intensity. Lastly, listen to your body and rest when needed to prevent injury and allow for proper recovery.
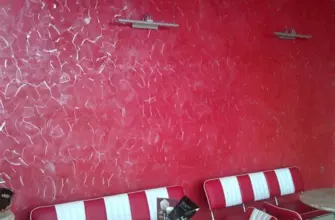
Технология нанесения венецианской штукатурки под мрамор
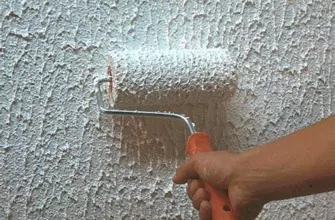
Первоначально, поверхность подготавливается к нанесению штукатурки. Это включает в себя очистку стен от пыли и грязи, а также выравнивание поверхности для обеспечения ровного и гладкого фона для работы. Затем начинается основной этап — нанесение венецианской штукатурки.
| Этап | Описание |
|---|---|
| 1 | Нанесение первого слоя штукатурки. |
| 2 | Высыхание и полировка первого слоя. |
| 3 | Нанесение второго слоя штукатурки и создание текстурного эффекта. |
| 4 | Полировка второго слоя для достижения мраморного блеска. |
| 5 | Защитное покрытие для сохранения эффекта и долговечности поверхности. |
Важно помнить, что успешное нанесение венецианской штукатурки под мрамор требует опыта и профессионализма мастера. Каждый этап процесса имеет свою значимость для окончательного результата, поэтому важно следовать технологии с особой тщательностью.
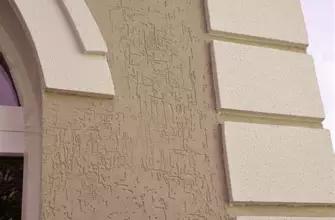
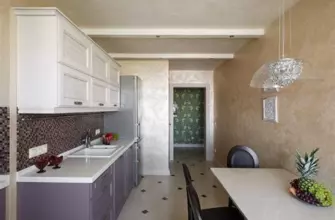
Шаги и особенности процесса работы мастера при создании интерьера с использованием венецианской штукатурки под мрамор
Процесс нанесения венецианской штукатурки под мрамор требует определённой техники и опыта. Вот основные шаги, которые мастер должен выполнить:
- Подготовка поверхности: Мастер должен тщательно очистить и выровнять стену перед нанесением штукатурки. Это позволит избежать неровностей и неправильного сцепления материалов.
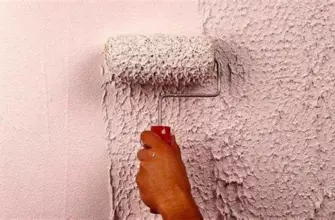
- Нанесение базового слоя: Первый слой штукатурки создаёт основу для последующих слоёв. Он должен быть нанесён ровно и тонко, чтобы избежать образования излишков материала.
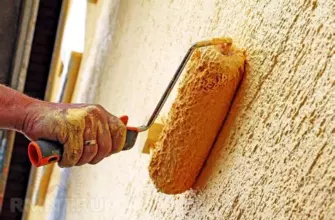
- Формирование текстуры: Мастер использует специальные инструменты и техники, чтобы придать штукатурке желаемую текстуру, имитирующую мрамор.
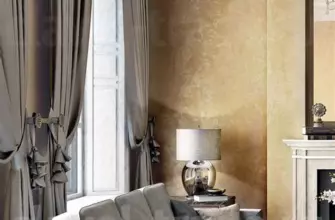
- Нанесение отделочного слоя: Последний шаг в процессе — нанесение отделочного слоя, который придаёт поверхности блеск и защиту. Этот слой также может содержать добавки, улучшающие характеристики материала.
Важно: В процессе работы мастер должен обеспечить хорошую вентиляцию помещения и защиту от попадания пыли и грязи на свежую штукатурку. Это поможет избежать дефектов и обеспечит качественный результат.
| Шаг работы | Средняя стоимость |
|---|---|
| Подготовка поверхности | от 200 до 500 |
| Нанесение базового слоя | от 300 до 700 |
| Формирование текстуры | от 500 до 1000 |
| Нанесение отделочного слоя | от 400 до 800 |
In the depths of the ocean, there lived a unique superhero named Sharky, who was not only a fearsome predator but also a dedicated dental hygiene advocate.With his sleek, sharp teeth and powerful jaws, Sharky roamed the underwater world, protecting marine life from any danger that lurked in the shadows.But Sharky’s greatest mission was to spread the importance of tooth-brushing among his fellow sea creatures, teaching them the significance of oral health.Armed with a toothbrush and minty-fresh toothpaste, Sharky fearlessly swam from reef to reef, holding dental hygiene workshops for fish, turtles, and even octopuses.Thanks to Sharky’s efforts, the ocean’s inhabitants embraced dental care, ensuring that every smile beneath the waves sparkled as bright as the sunlit surface above.
Great! Let’s start with an easy one: What is the capital of France?